Create and apply virtual lighting vectors.
JP.Lee
Summary.
When working on demand related to mobile game rendering, it is often impossible to perform complex lighting processing due to hardware performance.However, artists’ demand continues to increase.In particular, there are times when it is necessary to correct information that has been subjected to static lighting (BakedLighting).I’m going to create a simple example and explain how to additionally create indirect lighting from the scene’s lighting and how to use it.
Content.
1. Simple C # script writing ability is required.
2. Basic shader code writing skills are required. However, for ease of explanation, we will use the Amplify Shader Editor.
Only the direction, brightness, and color of the dominant lighting Directional Light is needed.
Just import the direction vector of the engine’s Directional light.The direction vector is Transform.forward.
There is no need to calculate the direction vector separately or obtain the direction vector separately from the shader.
Let’s think about what we can use as Mask in our rendering system.
Statically produced black and white textures may be one of the most commonly used masks.However, it is not enough to displace the object or to deepen the shading and lighting effects of the geometry.
I personally use NdotL frequently as a mask.
In particular, it is often used for processing effects of dynamic objects.Expressions like mad (NdotL, A, B) can control NdotL more flexibly than HalfLambert.Especially when I use it as a mask, I mainly use it.
Alternatively, we can use the ShadowMask that we use as a Mask, and Ambient Attenuation can be used as a Mask if needed.
Let’s look at an example to get an idea.
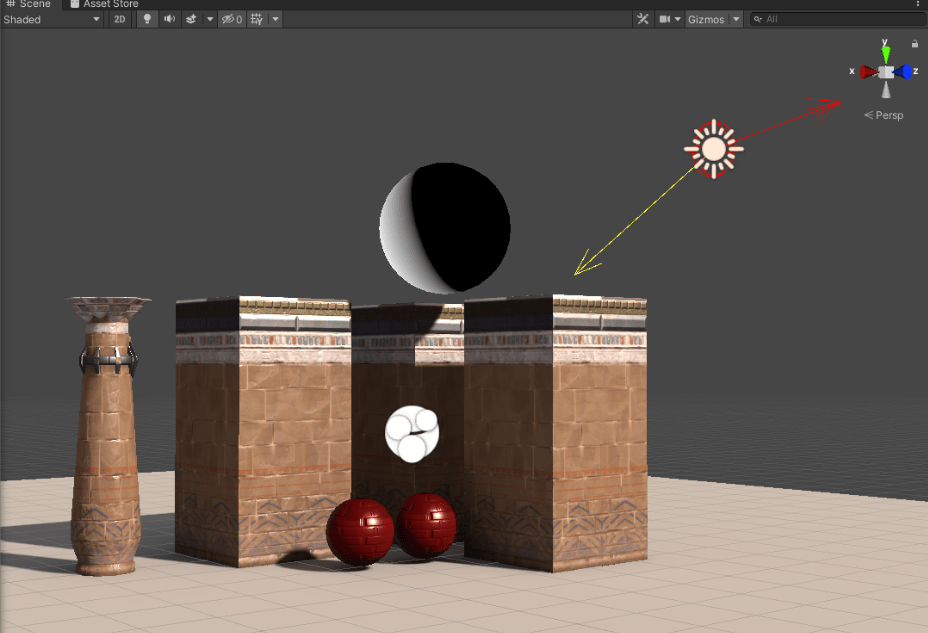
The lighting component of the scene.
Directional Light ( Dir vector , Color , Intensity , Attenuations… so on )
|_ _ Sub Light (Dir vector , Intensity , Color is Option )

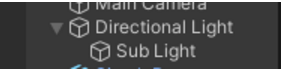
The sub light was added directly as a child node of the Directional Light. If you add a component directly to the Directional Light, you have to make the code more complicated.
The artist will be able to easily adjust the direction of the sub light.
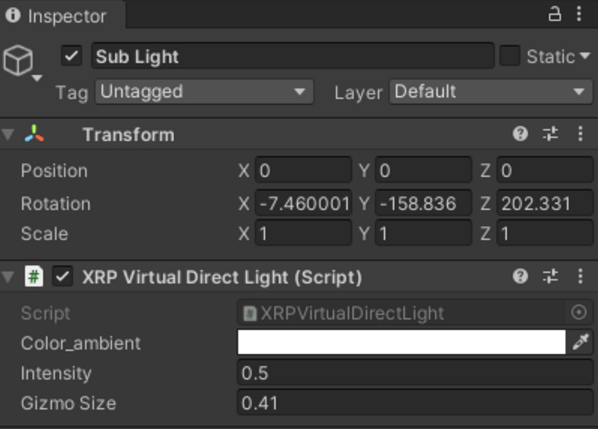
The completed script (Component) has Color and Intensity exposed.However, this example does not use this value directly.
First, let’s look at the simple implementation code below.
using UnityEngine;

#if UNITY_EDITOR
    using UnityEditor;
#endif

using System;
using System.Collections;
using System.Collections.Generic;

[ExecuteInEditMode]
[DisallowMultipleComponent]
public class XRPVirtualDirectLight : MonoBehaviour
{
    Light lightGameOject;

    public Color color_ambient = Color.white;
    public float intensity = 0.5f;
    public float gizmoSize = 0.25f;
    Vector3 LightingForwardVector;


#if UNITY_EDITOR
    void OnValidate()
    {

    }

    void Start()
    {
        lightGameOject = gameObject.GetComponentInParent(typeof(Light))as Light;
    }

    void Update()
    {
        if (EditorApplication.isPlayingOrWillChangePlaymode) return;
        LightingForwardVector = this.transform.forward;
        Shader.SetGlobalVector("_LightingForwardVector", -LightingForwardVector);

    }

    void OnDrawGizmos()
    {
        DrawGizmosAll();
    }

    void DrawGizmosAll()
    {

        Gizmos.color = Color.red;
        var endPoint = transform.position + transform.forward * 2;
        Gizmos.DrawLine(transform.position, endPoint);
        Gizmos.DrawWireSphere(transform.position, gizmoSize);
        Gizmos.DrawLine(endPoint, endPoint + (transform.position + transform.right - endPoint).normalized * 0.5f);
        Gizmos.DrawLine(endPoint, endPoint + (transform.position - transform.right - endPoint).normalized * 0.5f);
        Gizmos.DrawLine(endPoint, endPoint + (transform.position + transform.up - endPoint).normalized * 0.5f);
        Gizmos.DrawLine(endPoint, endPoint + (transform.position - transform.up - endPoint).normalized * 0.5f);

        Gizmos.color = Color.yellow;
        var endPointDirLight = lightGameOject.transform.position + lightGameOject.transform.forward * 3;
        Gizmos.DrawLine(endPointDirLight, endPointDirLight + (lightGameOject.transform.position + lightGameOject.transform.right - endPointDirLight).normalized * 0.5f);
        Gizmos.DrawLine(endPointDirLight, endPointDirLight + (lightGameOject.transform.position - lightGameOject.transform.right - endPointDirLight).normalized * 0.5f);
        Gizmos.DrawLine(endPointDirLight, endPointDirLight + (lightGameOject.transform.position + lightGameOject.transform.up - endPointDirLight).normalized * 0.5f);
        Gizmos.DrawLine(endPointDirLight, endPointDirLight + (lightGameOject.transform.position - lightGameOject.transform.up - endPointDirLight).normalized * 0.5f);
        Gizmos.DrawLine(lightGameOject.transform.position, endPointDirLight);

    }

#endif
}
void Start()
    {
        lightGameOject = gameObject.GetComponentInParent(typeof(Light))as Light;
    }
This part may or may not be necessary.I called the Llight component of the sub light’s parent node because it may be necessary to use the value of the Directional light. I called it because of the screen Gizmo UI in this example.Directional light was personally uncomfortable when working with shaders because you have to make a choice to know where the direction is going.Perhaps artists think similarly.
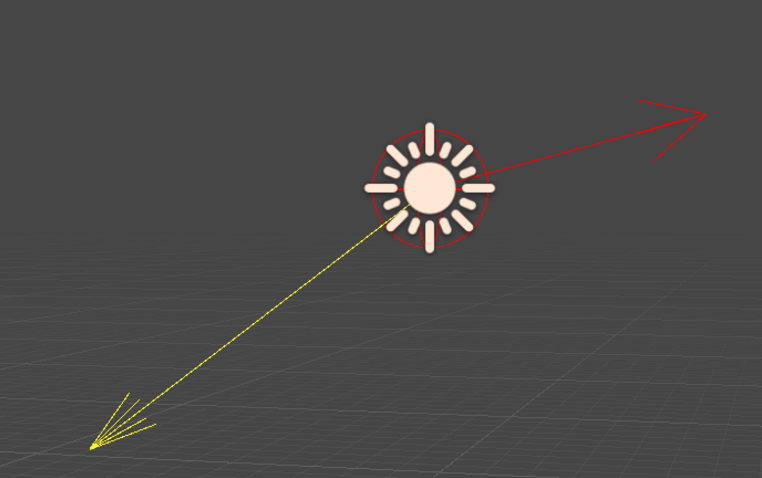
The yellow direction of the screen indicates the direction of the Directional Light, and the red indicates the direction of the Sub light.It is always displayed on the screen.
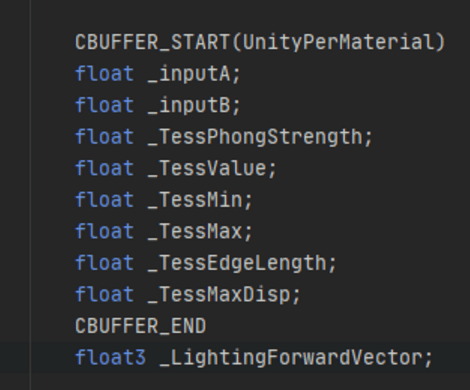
Sub-light direction vector applied to the test shader.
void Update()
    {
        if (EditorApplication.isPlayingOrWillChangePlaymode) return;
        LightingForwardVector = this.transform.forward;
        Shader.SetGlobalVector("_LightingForwardVector", -LightingForwardVector);
    }
Shader.SetGlobalVector("_LightingForwardVector", -LightingForwardVector);
If you look at this part, it was negate with -LightingForwardVector.This is because I think the white part is the part to which the additional effect will be applied when Lerp inside the shader.
I added it to the shader code to make this part work.
NdotL is wrapped with the mad function.
float MadNdotL13( float madNdotL , float inputA , float inputB )
{
   madNdotL = mad(madNdotL,inputA , inputB);
   return madNdotL;
}
If lerp (A, B, Mask), white will return B.
Let’s simply mix the two colors.

The shader for simple testing was created with the Amplify Shader Editor.
Debug view for simple understanding.
It can be applied when the artist’s demand is to be handled independently of the direction of the direction light sometimes.
For example, it can be used to modify the lighting result of a certain angular range of a specific area, it can be used as the value of Blending Weight of ShadowMask, or it can be used as a Bent Direction to modulate Fresnel.
It’s definitely not normal, but when you’re developing a mobile game, there are times when you have to think about it.

댓글 남기기