请先阅读。
最新的Unity版本的Kaiser滤镜无法达到传统的NVIDIA Kaiser滤镜结果。
实际上,Unity公司修改了Kaiser滤镜结构,但这是加快导入纹理速度的一种方法。
甚至最新的2020年Kaiser过滤器版本也比以前更清晰。
Read it first.
The latest Unity version of the Kaiser filter does not reach the traditional NVIDIA Kaiser filter results.
In fact, the Unity company modified the Kaiser filter structure, but it was a way to speed up the Import Texture.
Even the latest 2020 version of Kaiser filter isn’t sharper than it used to be.
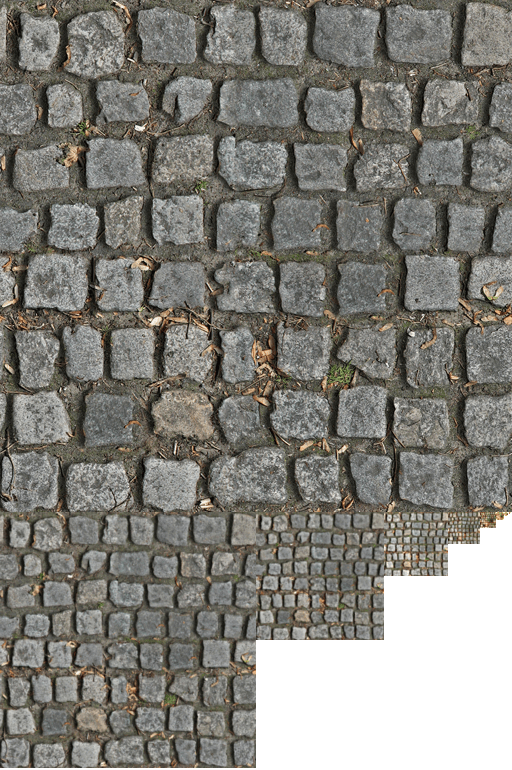
我不会详细解释Mip贴图,因为我们的学生已经知道Mip贴图基本上是什么。
请参考下图。
I won’t explain mipmaps in detail because our students already know what Mip-maps are basically.
Refer to the picture below.
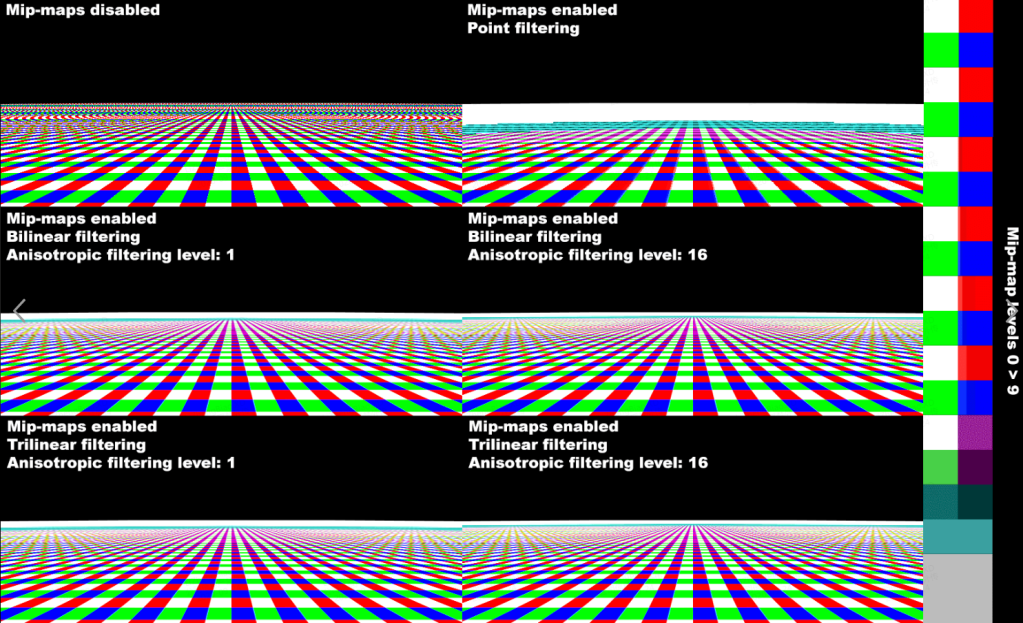
在远处查看对象时,纹理模糊是由mipmap引起的。 但是,如果没有mipmap,则对象的视觉效果可能会变差,并且渲染性能也会变差。
本指南说明了如何在不完全禁用mipmap的情况下控制Unity纹理mipmap的模糊性。
Blurry textures when viewing objects at a distance are caused by mipmaps. However without mipmaps objects may appear visually worse as well as being worse for rendering performance.
This guide explains how to control the blurriness of Unity texture mipmaps without needing to disable mipmaps completely.
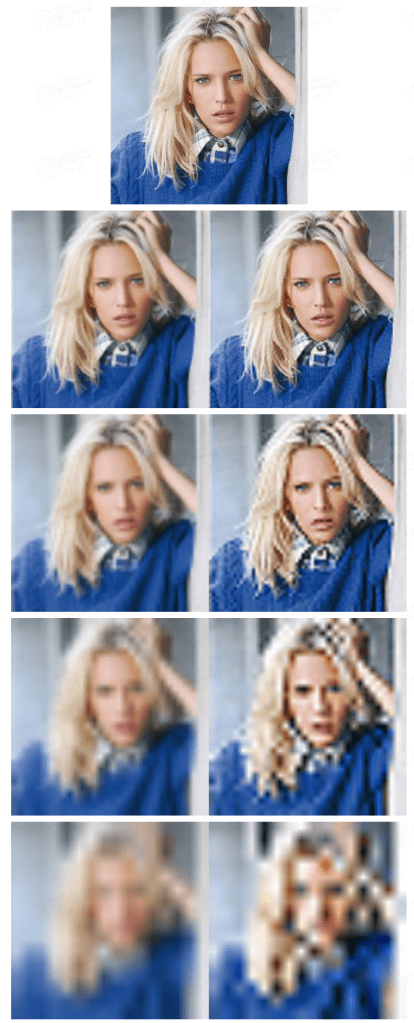
可视化显示的结果,具体取决于是否使用了Mip贴图和像素采样设置。Visualized the results displayed depending on whether mip-maps were used and pixel sampling settings.
请注意,生成mipmap会使纹理的文件总大小增加约25%,因此,如果您尝试将文件大小保持较小,并且该纹理在远处看起来很好,则远处将永远无法查看,否则GPU渲染成本就不会增加。 如果遇到问题,则可以禁用Mipmap,以减小游戏文件的大小。
Note that generating mipmaps increases the total file size of the texture by about 25% so if you’re trying to keep file size low and either the texture looks fine at a distance, will never be viewed at a distance or GPU rendering costs aren’t an issue then you can keep mipmaps disabled to reduce game file size.

A typical solution is summarized.
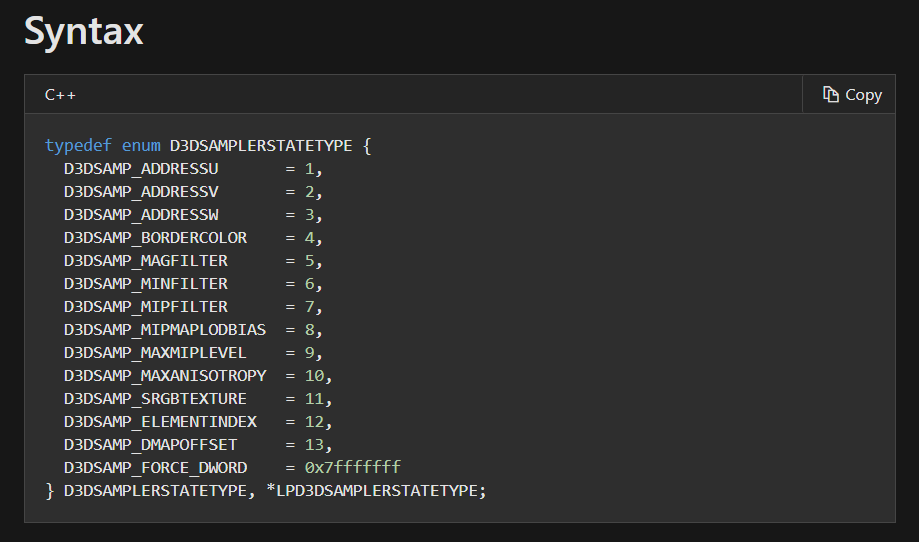
使用(更改)mipmap偏差
可以在“样本状态”或“着色器”中进行更改。
通常,它是最广为人知的解决方案,但也有其缺点。
该原理是为了纠正使用更多细节纹理的偏见,因此纹理缓存中的性能会下降。
因此,它不能应用于所有纹理,并且只能选择和使用特别有问题的纹理。
基于mipmap最初试图解决的距离的混淆问题很容易发生。
很难找到在所有情况下都能正常工作的偏差值。
Use (change) mipmap bias
It can be changed in Sample State or Shader.
It is generally the most widely known solution, but it also has its drawbacks.
- This principle is to correct the bias to use more high detail textures, so there is a performance degradation in the texture cache.
- Therefore, it cannot be applied to all textures, and only textures that are particularly problematic can be selected and used.
- Aliasing problems based on the distance the mipmap is originally trying to solve easily occurs.
- It is difficult to find a bias value that works well in all cases.
应用离线过滤器(锐化过滤器)
使用双线性过滤器创建mipmap是很常见的。 然后就是收集2×2相邻像素并将它们均匀混合。 除此之外,我还见过这样做的人,因为他们说最好使用kaiser滤波器等,但我个人认为结果并不十分有效。
解决方法。
只需再次将“锐化”滤镜应用于mipmap纹理。
Mipmap看起来模糊的原因是,仅使用双线性滤波来粉碎纹理像素边界,但是再次应用锐化滤镜将再次使纹理像素清晰恢复。
由于它使用离线过程,因此不会影响游戏性能。
- 从mipmap 0生成mipmap 1(双线性过滤器)
- 将锐化滤镜应用于mipmap 1
- 根据结果2生成Mipmap 2(双线性过滤器)
- 将锐化滤镜应用于mipmap 2
- 重复直到mipmap结束…
Apply offline filter( Sharpening filter )
It is common to create mipmaps using bilinear filters. Then it’s all about collecting 2×2 neighboring pixels and mixing them evenly. In addition to this, I’ve seen people who do that because they say it’s better to use a kaiser filter, etc., but I personally don’t think the result is very effective.
Resolution approach.
Just apply the Sharpening filter once more to the mipmap texture.
The reason mipmaps look blurry is that only bilinear filtering is used to crush the texel boundary, but applying the sharpening filter once more will restore the texel clearly again.
Since it uses an offline process, it does not interfere with game performance.
- Generate mipmap 1 from mipmap 0 (bilinear filter)
- Apply sharpening filter to mipmap 1
- Generate mipmap 2 from result 2 (bilinear filter)
- Apply sharpening filter to mipmap 2
- Repeat until the end of the mipmap…

댓글 남기기