
Three tone-mapping functions are added and evaluated. This assessment is for characterization purposes only and is not a guide to best practices.
Neutral Advance
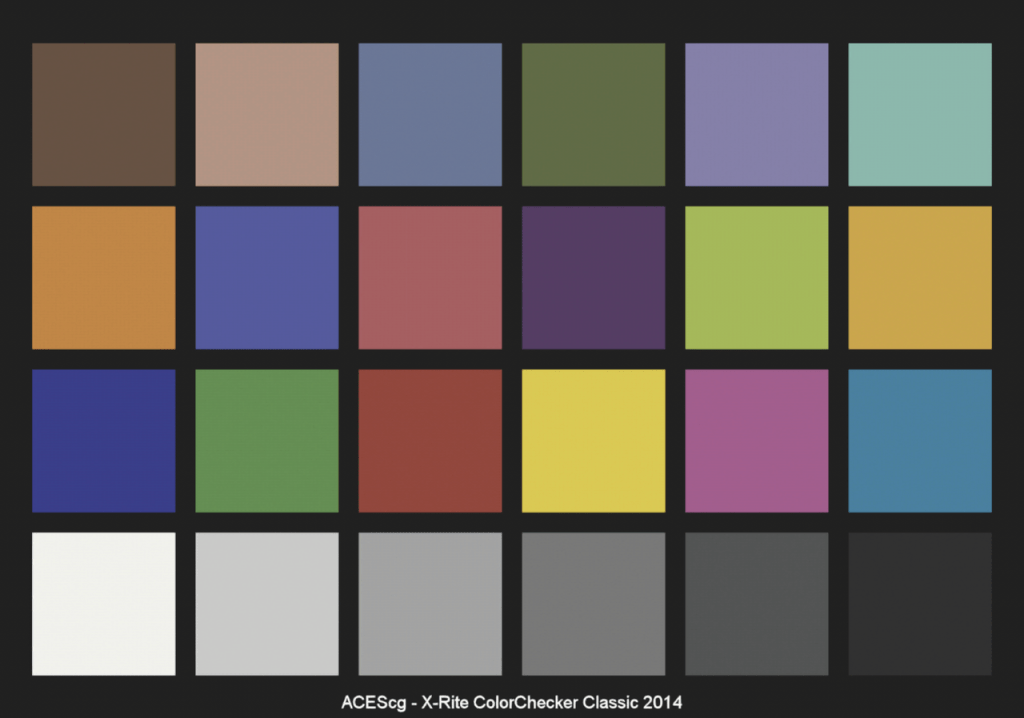
It exposes the hidden variables of Neutral tone-mapping suitable for the classification project.
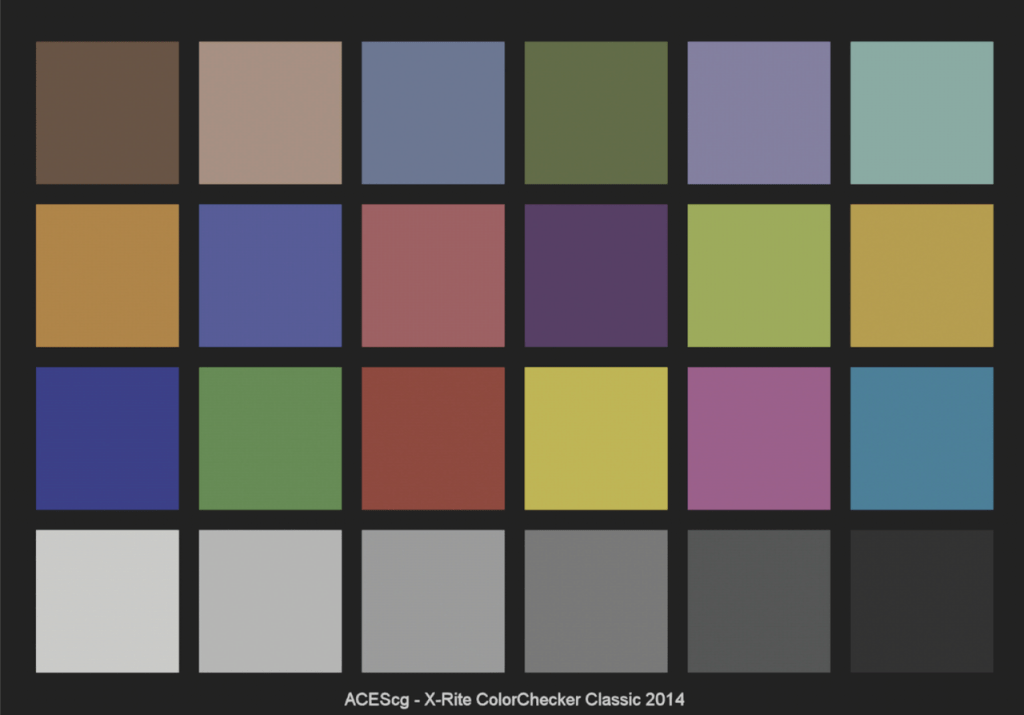
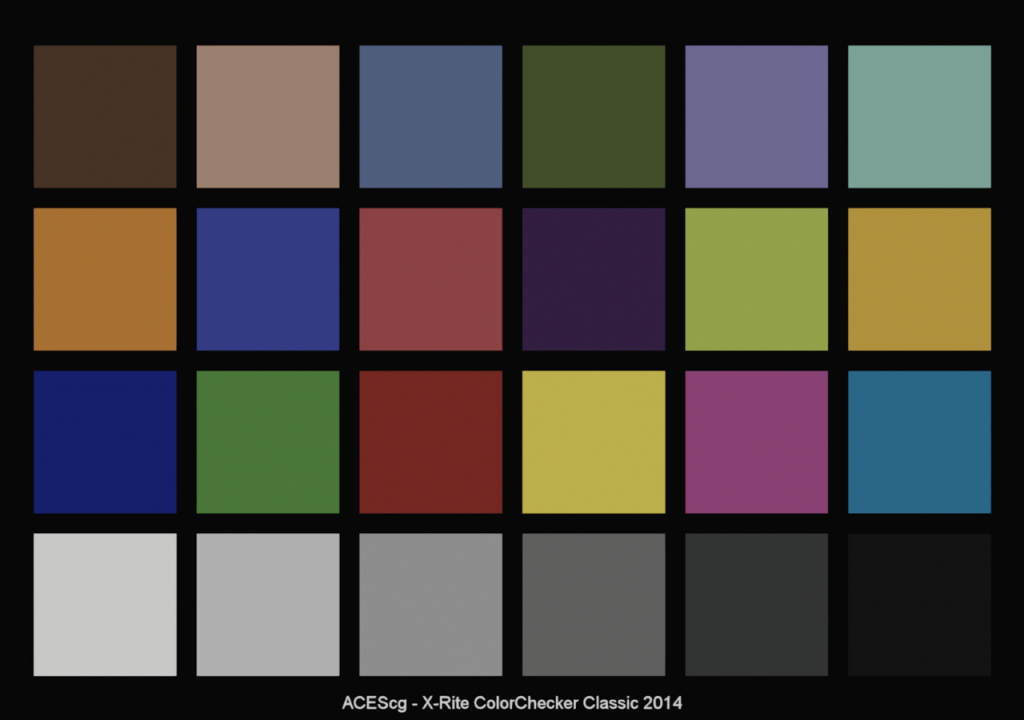
When Neutral tone-mapping is applied, the saturation and contrast of colors are generally lowered. Let’s see how the color is output using the X-Rite Color evaluation table.

Marmoset Hejl
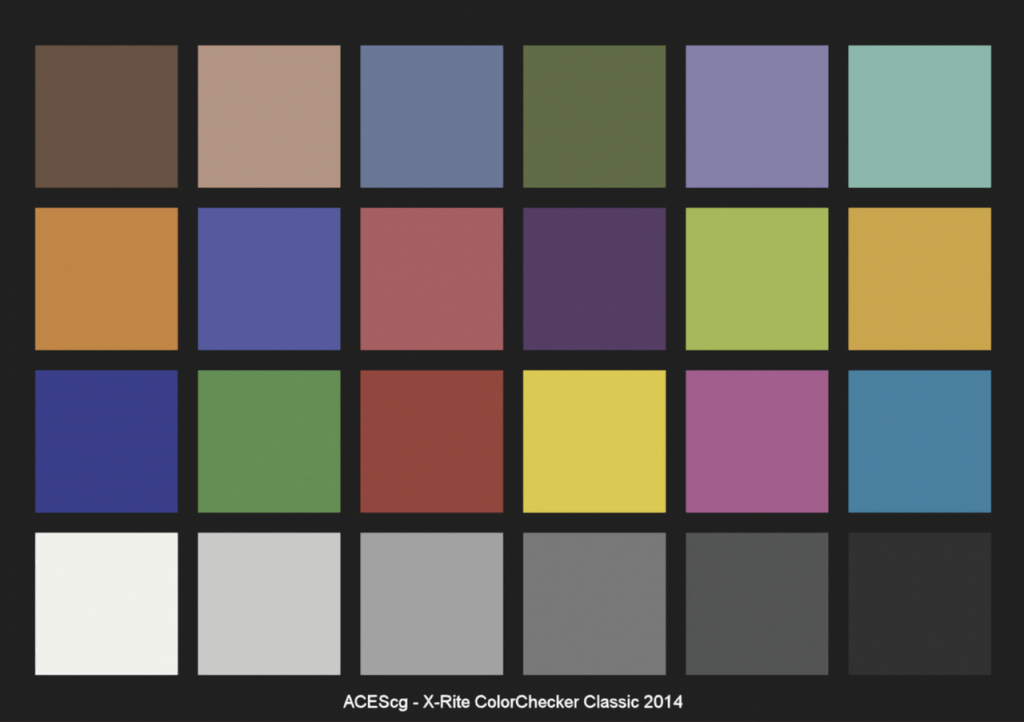
Hejl: One of the more popular filmic tone mappers (pre-ACES), meaning it’s based on a sigmoid curve which provides a smooth roll-off to highlights and a bit more contrast in the shadows.
Marmoset ACES
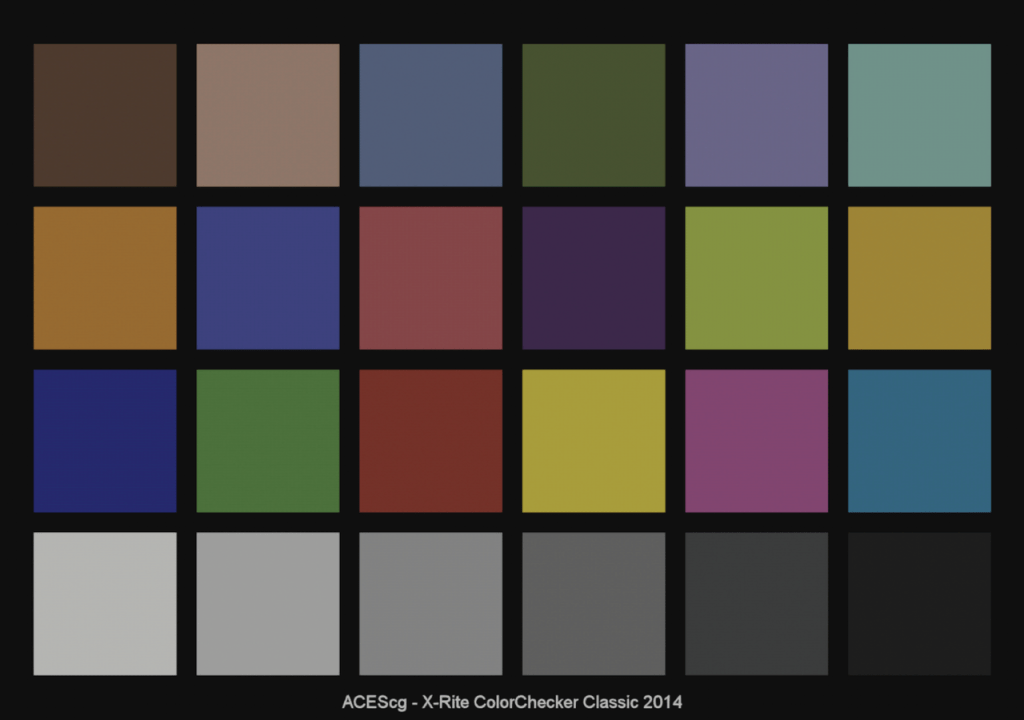
Compared to standard ACES, when the colour histogram is measured, the saturation is about 10% higher, but the dramatic contrast change is almost the same. Compared to Standard ACES, if you look at the range of the Roughness area, it shows a slightly softer effect. Personally, if you dare to use ACES, it is recommended to use Marmoset ACES.
Note: I know that Standard ACES is mainly used for photorealistic rendering, etc., but it is just an industry-standard tone mapping best suited to the tone mapping HDR compression workflow of an image input as log-linear.
Marmoset Toolbag Lookdev analysis for Artist.
Overview.
What is this document? This document summarizes the content analysis for experimenting to reduce the deviation between the Marmoset Toolbag and the Unity rendering result by changing the internal settings of the Unity engine in what format.
Let’s take a look at the lighting system settings of the Marmoset Toolbag, which artists mainly use. Analyze the result of applying ACES Tone-mapper of Marmoset Toolbag, which is mainly used by artists. Using the standard colour chart, let’s display the colour deviation before and after applying the ACES Tone-mapper of the Marmoset Toolbag as a histogram. I set it to Unlit because I’m going to look at the colour difference change. Now the IBL lighting itself will not affect the colour chart.
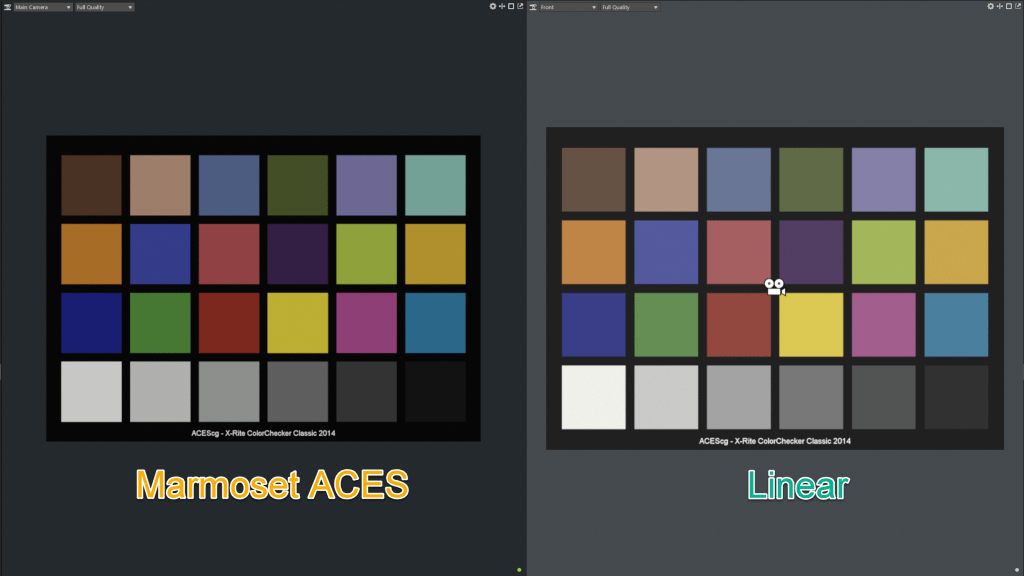


The left side is a histogram with Marmoset ACES applied, and the right side is a histogram with a linear condition. If you look at the colour distribution, you can see that the overall distribution graph is shifted to the left. The point is that the colour distribution graph as a whole move to the left in the horizontal direction while performing LDR compression, and accordingly, the bright part changes slightly and the dark part becomes darker. Please look at the grey tone change in the upper colour chart. The artist tries to change the Exposure value of the Marmoset toolbag ACES because this phenomenon occurs. Let’s actually change it. For the changed value, I will apply Exposure 1.552, which is the value of the Dwarf scene-setting.

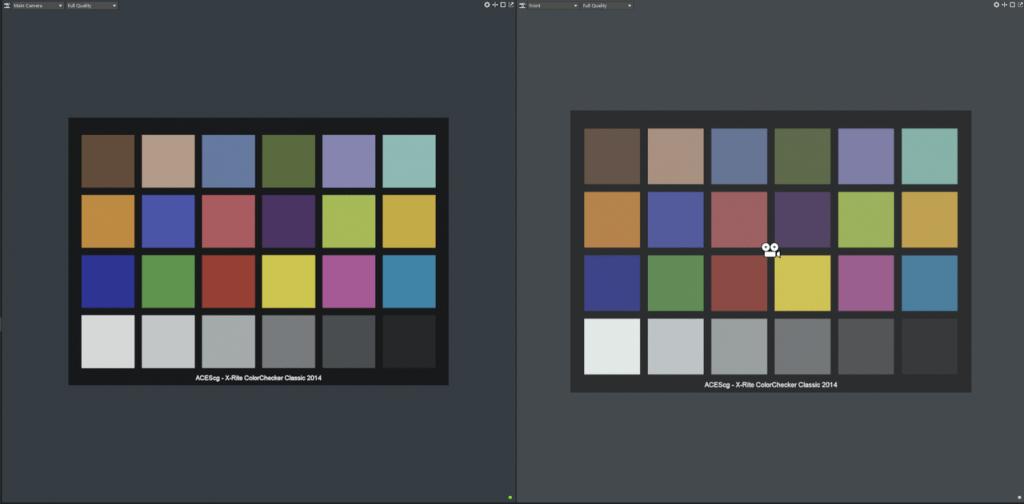
If you look at it with the naked eye, you will notice that the overall brightness has improved. Let’s look at the Histogram again with this value.

Comparison of horizontal shift results of histograms. When the exposure was changed and ACES was applied for the first time, the distribution of the histogram shifted to the left was slightly lengthened to the right, and it can be seen that some distributions that were concentrated in the left end (black part) moved to the right. Analysis after applying IBL lighting and PBR Lit.


Because the Lit Material was used, the IBL light value was reflected in the brightness and color of the diffuser. Even in this state, Aces is applied (left) and the histogram distribution in the Linear state is shifted to the left.
Unity3D Test.


Use a visual comparison to see the differences as a whole first. Let’s extract the pixels of colour in Photoshop and compare the colour difference. Concentrate on the deviation between the Red and Green parts.
Color Primary may change during the RRT → ODT process used by the Aces internal calculation algorithm, so you need to check it.
Color Primary Result Compare.

Color Histogram Result Compare.
Using a colour chart, after applying marmoset Aces and U3D Aces respectively, the Histogram was compared.

Organize
Both marmoset Aces and U3D Aces use the RRT → ODT conversion method, but when analyzing the internal code, marmoset Aces is supposed to perform the conversion process Approximate, whereas U3D Aces complies with the ACES 1.03 standard. After applying Aces tone-mapping, the increase in dark distribution in both is almost the same, so the artist tries to restore the brightness of the overall scene using a bottle post-Exposure.
Conclusion
- Question: Can we use marmoset Aces integrated into U3D? Yes, it will be possible.
- Question: Can the environment art team authorize the use of integrated marmoset Aces? Yes, both are unlikely to cause a major problem since the variance is below 5%.
- Question: If the deviation is below 5%, can I just use U3D Aces? In fact, yes.
- Question: What should Artists pay attention to when using Aces in marmoset and Aces in U3D? Yes, their Post-Process user interface design is slightly different, so if you change the Exposure value to 1.552 after using marmoset Aces, in U3D, be sure to add the Color Adjustments Component under the Tonemapping component and then set the Post Exposure value to 0 should be modified to 0.552. They aren’t exactly the same as each other, but if you can tell them apart visually, it’s no big deal.
- Question: Should Artists continue to use marmoset ? no. When U3D internal Shader development is cleaned up, there is no need to do temporary look-dev work with marmoset .
Opinion
- Suggest turning off Raytracing when working in marmoset. This is because the game engine does not use raytracing.
- Disable Local reflection and Local Ambient Occlusion in marmoset. This is not a feature used by the game engine.
- Use the HDR Image used in the game engine standard scene. If you use the preset provided by the marmoset developer when you set the lighting using other DCC tools or game engines, various parts such as skin colour or pupil reflection may look very different.

댓글 남기기